4.12.2012

The Seeds Have Sprouted Without Pesticides

If you asked people whether or not they trusted the government most of them would tell you "NO". Yet for some the government's control over food or lack thereof, goes unnoticed.  For those of us who know not to trust the government's oversight of our food safety many choose organic over conventional produce in order to avoid pesticides. While the toxicity of each pesticide varies, birth defects, nerve damage, cancer, and "other" health effects are listed on the EPA's website as potential outcomes of pesticide exposure. The sensitivity to these chemicals will vary among individuals and I think people should avoid them if possible. My husband likes to tease me by asking if I want a radioactive rock because it's "all natural". The thing is, we know radiation is dangerous so we protect ourselves from it. So, why do we allow our food to be sprayed with things which can cause adverse health effects? As a former analytical chemist what concerns me is that the toxicity of each pesticide is tested individually. While it would be a lengthy and complex study I'd like to see someone attempt to understand how all of the pesticides combined affect our health. 


In the meantime, I trust myself and I really want to know what happens to my produce. So, I've started some seeds indoors for a vegetable garden this year. At the local store I picked up a Burpee Self Watering Seed Starter kit with 16 cells. (see video below) The set came with soil optimal for sprouting seeds and a design that allows it to water itself for 10 days. In the photo below you will also notice the tray is stamped with the letters A, B, C, and D. The kit also contained a map of the tray layout with the letters so you can keep track of where things are planted. Some say to buy a light specifically for growing plants but I used a small desk lamp during the day to generate some heat. 


I chose seeds in the store from Seeds of Change not only because they are organic but also because I support their overall mission.
Some seeds perform better when they are started indoors and others must be started outside. Starting seeds indoors generates a productive garden earlier, it is also less expensive to buy seeds than individual plants. An additional bonus, since I purchased heirloom seeds I can save seeds from my garden for use next year. 


In each cell I planted a few extra seeds just in case a few didn't sprout. Although I didn't keep track I'm pretty sure I'm near a 100% germination rate. I have more lettuce sprouts than my 8' by 4' raised garden bed is going to allow for if I wish to have any variety. (See the second row from the top in the photo below) Lettuce seedlings have to be planted 12" apart so I'm going to plant 10 or 12 and try growing a few indoors. It is very hot and dry here in southwestern Idaho so I'm curious to see how lettuce will do in this environment. 


Sprouted Seeds in a Burpee Self Watering Seed Germination Kit (cover removed)


The lettuce, cucumbers, and tomatoes were the first to sprout. Beans, watermelon, basil, and cantaloupe followed behind. Bell peppers and jalapenos took the longest to sprout. They nearly took 2 weeks so be patient and don't forget to check the water level in the sprouting kit . When the seedlings were tall enough to reach the plastic cover of the seed kit I transplanted them into planters shaped like window boxes. I chose this shape because they fit in the windowsill but any container will certainly do. 


There are fancy garden markers you can purchase but I opted for a simple homemade variety. I folded a piece of masking tape over the end of a toothpick and wrote the name of the plant on the tape. Since I spend my days keeping up with a toddler I needed something that was quick and didn't require a lot of fuss.


Stay tuned for more news from the garden.

2.26.2012

PGPR - Leave My Chocolate Alone

A friend gave me a piece of sugar free chocolate and it tasted surprisingly normal. When I Googled the ingredients I noticed it contained PGPR. I'd never heard of such a thing before so I had to do a little research. Read my full story here to see what natural chocolate ingredient manufacturers are removing to replace with PGPR. 


John Kasawa @ FreeDigitalPhotos.net
 http://www.freedigitalphotos.net/images/view_photog.php?photogid=2436

1.25.2012

Bifteck Hache A La Lyonnaise - Ground Beef with Onions and Herbs

Considering myself to be a pretty good cook I didn't fully understand how much work Julie from the movie Julie and Julia must have gone through. Since I didn't have a Julia Child cookbook in my collection I found a used version of Mastering the Art of French Cooking on Amazon.com. My first attempt a few months ago was a chicken dish with an herb sauce. The chicken was fried in a stick of butter and I thought the butter would burn since chicken takes a while to cook so I added a little vegetable oil. Well, when I added the eggs to make the sauce it broke apart. 


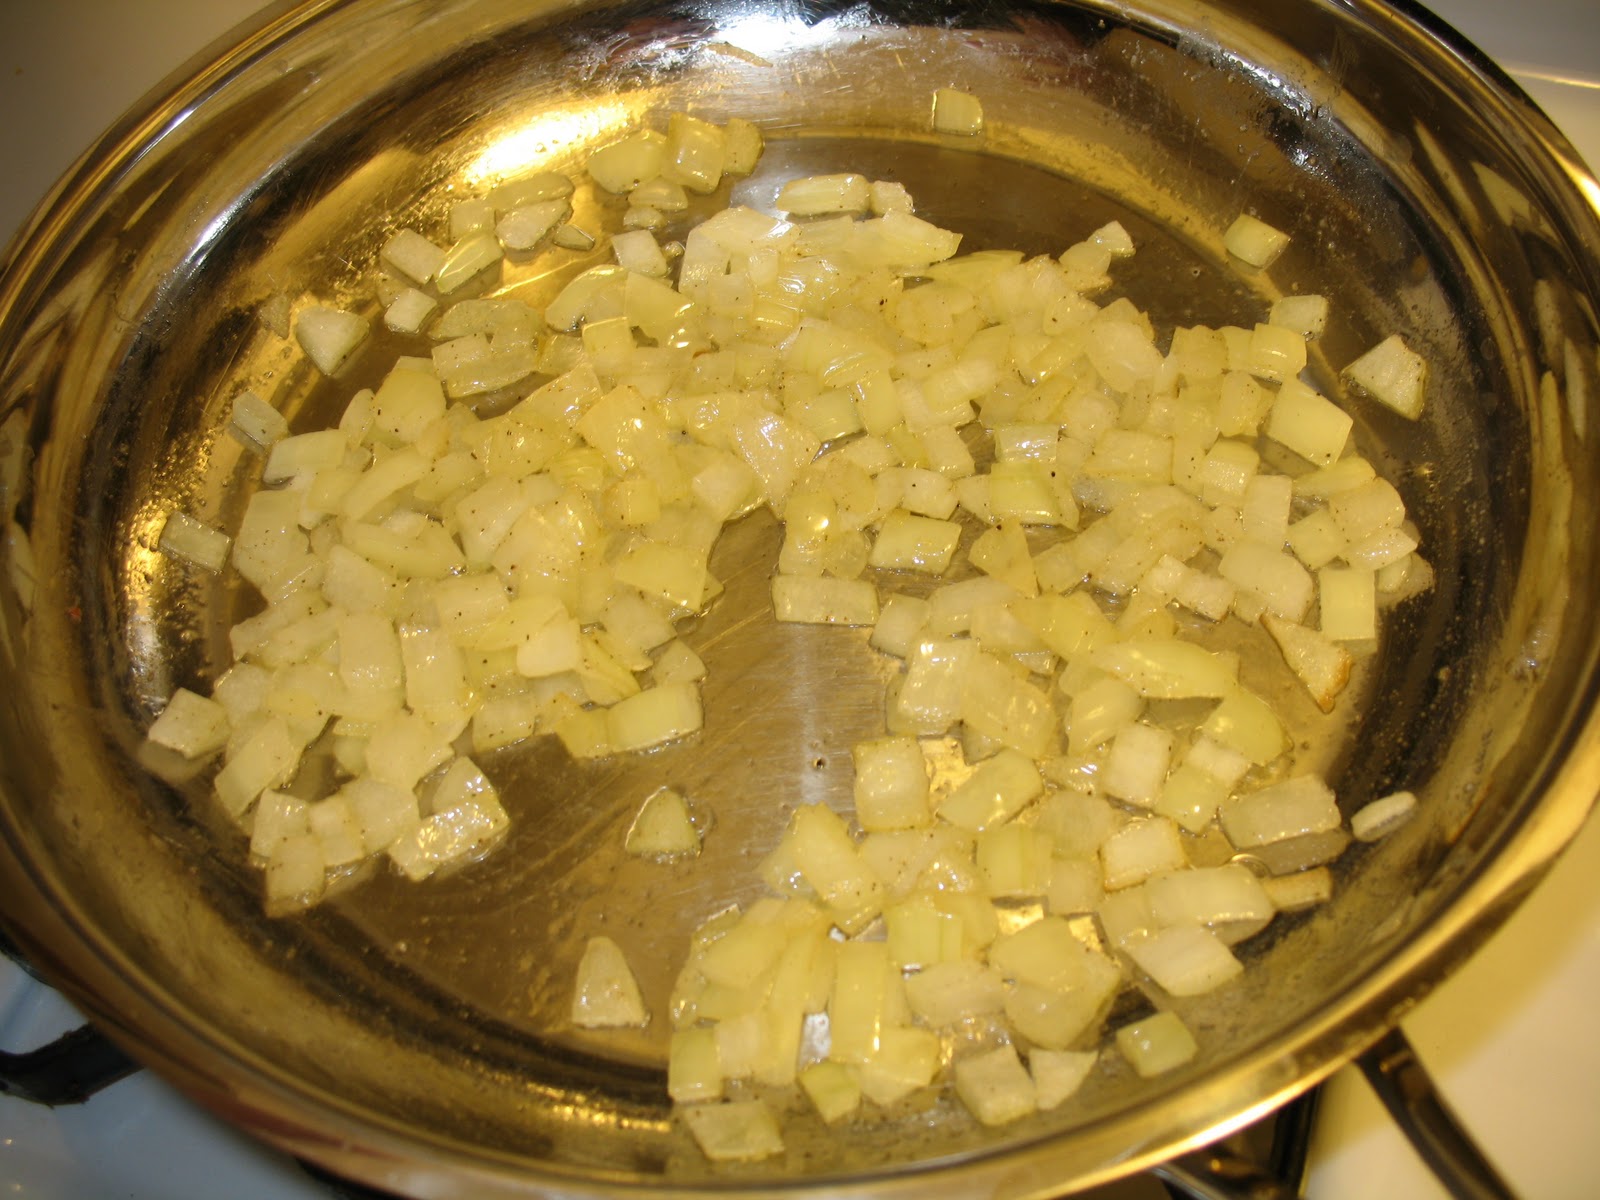
Looking through the cook book the other night I was surprised to find recipes for hamburgers. I thought for sure this would be easy and I wouldn't mess it up. Following the recipe I began by sauteing some onions in a pan until they were tender but not brown.

Sauteed Onions


To the ground sirloin I added salt, pepper, 1 egg, and the onions. 


After combining the ingredients I dipped them in flour and began to saute them in equal parts butter and oil just as the recipe called for. The book said to use 1 or 2 skillets to hold the patties in one layer. Since I was working with 3/4 lb of beef and was making 1 toddler sized burger I decided to cook 2 patties and then finish the 3rd in the same pan. I've learned my lesson from now on to do exactly what Julia says. The flour from the first 2 patties burnt in the bottom of the pan. I definitely wasn't thinking but I was also trying to pacify a hungry toddler, Skype with grandparents, and take photos while doing this. When the burgers were completed the pan drippings were to be used as a sauce. I knew the burnt flour would ruin the sauce so I removed the partially cooked 3rd burger from the pan so I could clean it. With fresh oil and butter I finished cooking the 3rd patty and poured the oil out of the pan. The recipe offers 5 different liquid choices to make a sauce and I chose pinot noir. 

Before I tried this recipe I had no idea that sauteed onions and thyme made such a delicious hamburger. They were so good I think putting it on a bun with the traditional toppings would ruin it. It was excellent by itself and the sauce managed to make it seem gourmet. 


When my husband came home from work late that night I told him that I tried another Julia recipe but managed to mess it up too. He pulled his from the fridge, warmed it in the microwave, and devoured it standing over the sink. He looked at me and sarcastically said "yeah, that was horrible".


Fantastic Meatloaf

Traditional meatloaf is slathered in ketchup which I am not a huge fan. So I scoured the web for a meatloaf recipe that didn't involve ketchup. Emeril is one of the chefs whose recipes never let me down. It's a great feeling as a home cook when a recipe turns out absolutely delicious. This meatloaf is basted with broth. The recipe calls for veal stock but I use beef broth because it is much easier to come by. 


It is a very simple recipe that contains onions, green peppers, garlic, salt and pepper for the seasoning. In addition to the traditional eggs and breadcrumbs the recipe also calls for heavy cream. I've never put milk or cream into a meatloaf before but it is fantastic.


The recipe calls for both ground beef and ground pork. I've made it using only beef and it's good, but the ground pork does take it to another level. When the meatloaf is finished the pan drippings are used to make a gravy. I'm tempted to call this meatloaf the poor man's roast. It doesn't take all day like a roast but is just as satisfying. You must give it a try!

Mom's Meatloaf Recipe - Emeril Lagasse on FoodNetwork.com


Ingredients

  • 2 teaspoons butter
  • 3/4 pound ground beef
  • 1/4 pound ground pork
  • 1 cup minced onions
  • 1/2 cup minced green peppers
  • 1 tablespoon chopped garlic
  • 2 eggs
  • 1/2 cup heavy cream
  • 3/4 to 1 cup bread crumbs
  • Salt and fresh ground black pepper
  • 2 cups veal stock
  • 2 tablespoons flour
  • 2 tablespoons water

Directions

Preheat the oven to 350 degrees F. Grease a roasting pan with the butter. In a mixing bowl, add beef, pork, onions, peppers, garlic, eggs, cream, and bread crumbs. Blend thoroughly. Season the mixture with salt and pepper. Shape the mixture into a loaf and place on the prepared pan. Pour the stock over the top and place in the oven. Place in the oven and bake for about 1 to 1 1/2 hours, basting occasionally. Remove the pan from the oven. Using a long spatula, remove the meat loaf from the pan. Place the roasting pan on the stove, over high heat. In a small bowl, whisk the flour with 2 tablespoons water. Whisk the slurry into the gravy. Bring the liquid to a boil and cook for few minutes, stirring constantly. Season the gravy with salt and pepper. Slice the meatloaf in to 8 pieces. Serve two slices ofmeat loaf per person with a spoonful of gravy.


1.19.2012

Vegetarian Reuben

Not only was it a hectic Saturday the weather was cold and crummy. My dinner thoughts included a grilled cheese and hot bowl of tomato soup. After I made a grilled cheese for my toddler I lost my excitement for the sandwich. I decided to slice some onion which sounded good, but it still didn't sound like it would hit the spot. Several years ago I saw a talk show featuring one of the reality stars from the Bachelor who made the grilled cheese I was now craving. His version included tomato slices and dill pickles. Unfortunately I didn't have either. 


Standing in front of the open refrigerator I began to scan the items on the shelf looking for inspiration. On the back of the top shelf I saw the jar of sauerkraut and immediately grabbed it. When I previously assessed the pickle situation I knew I had sweet relish. My husband who was watching this process began asking if I was pregnant. He doesn't like sauerkraut and hence has never had a Reuben. 


I put the buttered side of a piece of wheat bread face down in a hot skillet and topped it with cheddar cheese slices, red onion, sauerkraut, and more cheese. To the other slice of bread I buttered one side and spread mayonnaise on the other. With a spoon I added a layer of sweet relish on top of the mayo and put the relish side down on top of the cheese. 


After I toasted the other side in the pan I cut the sandwich in half and took my first bite. It was delicious! My husband asked what it tasted like and I said "a Reuben". "So you made a Vegetarian Reuben?" he said. "Yes, and I'll give you credit for naming it". 


Ingredient List
  • 2 slices of bread (I used wheat but rye would have been better)
  • Slices of cheddar cheese
  • Slices of onion
  • Sauerkraut
  • Sweet pickle relish
  • Mayo
  • Butter


1.15.2012

Cowboy Roasted Chicken

Yesterday I didn't have much gumption to make dinner so I decided to make a roasted chicken. Although I put the bird in the refrigerator to thaw the day before it was still partially frozen. I was going to rub the bird with a butter and herb mixture but I knew I wouldn't be able to put butter between the skin and breast. Instead I grabbed my husband's favorite spice blend and rubbed a generous amount on the chicken. 

Image: sweetbaysupermarket.com

After applying the rub to the chicken I put it in a 350 F oven. When 20 minutes had passed I added a little safflower oil to the bottom of the pan. Vegetable oil will also work. Using a basting brush I combined some of the drippings with the oil and used them to gently baste the chicken. Every 15-20 minutes I continued to baste the chicken until it became golden brown. I inserted a meat thermometer in a few areas to test the temperature. Since I knew the bird was originally frozen I inserted the thermometer deep into the chicken without touching the bone. Bones can be hotter than the meat and give a false reading so make sure your thermometer doesn't touch them. Taking the recommendation of celebrity chef Emeril Lagasse I cooked the chicken until it was 160 F. Many sources suggest cooking poultry to 175-180 but chef Emeril has said on several cooking shows that temperature will dry out the meat. 

When the chicken was removed from the pan I covered it with foil to let it rest for 30 minutes. During the resting period the temperature of the meat will continue to climb. If the chicken will not be given time to rest I recommend the 175-180 F range. 

My husband carved the chicken and began nibbling on it while doing so. He ate most of his dinner over the roasting pan because he couldn't quit eating it. 

Later I added the chicken bones and pan drippings to an 8qt stockpot with water, a few bay leaves, sage leaves, salt, pepper, onion powder, and garlic powder. I covered the pot and let it simmer for an hour to make home made chicken stock. 

It was a delicious dinner and a bargain at $0.89/lb.

1.11.2012

Food Quotes


I feel a recipe is only a theme, which an intelligent cook can play each time with a variation. —–Madam Benoit


One cannot think well, love well, sleep well, if one has not dined well. —-Virginia Woolf
Food is our common ground, a universal experience. -
James Beard
Cooking is like love. It should be entered into with abandon or not at all. - Harriet Van Horne
The only time to eat diet food is while you’re waiting for the steak to cook. —Julia Child
There is no sincerer love than the love of food. –George Bernard Shaw

1.10.2012

Leftover Dinner Ideas

I'm not a huge fan of leftovers but I it is such a horrible waste to throw away food. Every time I visit the market I am shocked how expensive things are becoming. Have you ever left the store with only a few items feeling there's not much in your cart to eat but the bill comes to $50? Here are some shocking facts from an article I found in the New York Times.


One Country’s Table Scraps, Another Country’s Meal

As it turns out, Americans waste an astounding amount of food — an estimated 27 percent of the food available for consumption, according to a government study — and it happens at the supermarket, in restaurants and cafeterias and in your very own kitchen. 1
Click to Enlarge:
Source: "One Country's Table Scraps Another Country's Meal" by Andrew Martin, The New York Times May 18, 2008
  The problem isn’t unique to the United States.
In England, a recent study revealed that Britons toss away a third of the food they purchase, including more than four million whole apples, 1.2 million sausages and 2.8 million tomatoes. In Sweden, families with small children threw out about a quarter of the food they bought, a recent study there found. 1
And most distressing, perhaps, is that in some parts of Africa a quarter or more of the crops go bad before they can be eaten. 1

To help keep your grocery bill low and stop wasting food here are a few ideas to help turn your leftovers into a new meal. Personally I can only eat a dish a few times and then I need a change. So, I've learned to get creative in the kitchen. 


Meatloaf


Meatloaf is a very versatile dish that can be used in several ways

  • Turn it into chili
  • Add it to marinara sauce for a spaghetti topping
  • Mix it with elbow macaroni and a cheddar cheese sauce
  • Use it to stuff green peppers
  • Make it into meatloaf sandwiches

Chicken

When shopping for chicken it is best to buy the whole chicken or chicken still on the bone. Not only is it cheaper, the bones can be used to make your own chicken stock. A box of stock usually ranges from $2.50-$4.00. It is easy to make 8 quarts of stock with the remaining parts of a chicken. It's equivalent to getting the stock for free and also being paid to do so. Yesterday I bought a package with 2 chickens for $0.89/lb. The were also free-range without any antibiotics. Here is a short list of ideas. Maybe have roasted chicken the first night and then use the leftovers to create the rest. 

Beef Roast

If the roast is braised there is a likelihood you can save some beef stock.
  • Soups and stews
  • French dip sandwiches 
  • Beef stroganoff

Produce

I'd have to say the majority of what I've had to toss in the past has fallen under this category. 
  • Use it in omletttes or frittatas
  • Vegetable soup
  • Add fruit to a green salad
  • Juice it
  • Make fruit smoothies
  • Roast the vegetables for a side dish or sauce

Dairy

  • Milk: I used to be guilty of pouring out sour milk until I realized the expiration date on organic milk is usually a month away from the day you purchase it. Yes, it is a little more expensive, but how much are you spending when you buy milk every week? Plus it doesn't have any pesticides, fertilizers, antibiotics, or steroids in it.
  • Cheese: 
    • Sauces
    • Toppings
    • Soup
    • Omlettes
    • With crackers or a baguette, raw fruits and veggies, and a glass of your favorite wine.
  • Eggs: 
    • Sandwiches
    • Burritos
    • Pasta Carbonara
  • Butter: I think Paula Deen would be beside herself if she heard of anyone throwing butter way. In the past it has gotten a bad rap because it was believed to elevate cholesterol levels. As it turns out sugar is much worse for your cholesterol level than butter is. 
    • Biscuits
    • Pie Crust
    • Cookies
    • Hollandaise
    • Bernaise
I hope I've given you some leftover ideas you can put to good use. Here's an article I wrote for more ideas to save on groceries.


Kona Coffee

1.02.2012

Easy Buffalo Chuck Roast Recipe


Buffalo not only has less fat and fewer calories it also contains more iron and vitamin B-12 than beef, pork, or chicken. When it comes to taste some say the buffalo is slightly sweeter. In comparison to beef I'd say it's less gamey than beef. It's a shame that during the 1800's bison were hunted to near extinction for essentially everything but their meat.1 The roast I made was tender and absolutely delicious. I can't imagine letting good buffalo go to waste.


Full Text Article with Step-by-Step photos: Easy Buffalo Chuck Roast Recipe


Dakota Buffalo Company

12.28.2011

Biscuit Recipe

Homemade biscuits taste much better than those out of a can. They also have the ability to fill you up. No wonder they are still found in many homes and restaurants. For years, I struggled with making biscuits. It seemed like I could cook anything but a biscuit. Then my great aunt Gladys in Kentucky, a regular biscuit maker, told me I was rolling them too thin. Growing up I always remembered watching my grandmother roll out the biscuit dough. As it turns out, once the liquid has been incorporated you don't want to handle the dough any more than necessary. Too much rolling and kneading will cause the biscuits to be tough.


  • 2 cups of self-rising flour
  • 1 stick of butter
  • salt and pepper to taste
  • milk to incorporate


Cut the cold stick of butter into small pieces and add to the flour. Using your hands break down the pieces of butter until the flour begins to slightly resemble wet sand.


Add salt and pepper to taste and just enough milk to bring the dough together. On a floured surface use your hand to pat out the dough to a 3/4" to 1" thickness.


 If you don't have a biscuit cutter use an inverted drinking glass. Put the biscuits on a baking surface and combine the scraps of dough to cut out more biscuits.


  When all of the dough has been used brush the tops with melted butter.


 Bake in a 425 F oven 10-15 minutes, or until the desired color has been reached. 


Cornbread Recipe

I have a great aunt who makes phenomenal cornbread. She was visiting from out of state and I insisted she give me the recipe. Well, it wasn't that simple. Turns out she makes her cornbread based on how the dry ingredients feel. With a pen and paper in hand I began to take notes as she proceeded to make cornbread.


  • 1 cup of cornmeal
  • 1 cup of self-rising flour
  • 1/2 cup of sugar
  • 2 eggs
  • pinch of salt
  • 1/4 cup of vegetable oil
  • buttermilk or milk
Over the years I have played with the amount of sugar in the recipe. Adding 1/4 the total amount of flour and cornmeal gives it a sweet taste that's not overly sweet. Buttermilk reduces the amount of sweetness slightly and gives the cornbread a hint of a tang. I have used regular milk when I'm out of buttermilk and the cornbread is slightly sweeter. Whichever you are using add enough milk/buttermilk until the mixture reaches a cake batter consistency. You don't want it to be too thin, but you want to be able to stir the mixture by hand with a little resistance. The amount of oil added will determine how much moisture the cornbread has. Bake in a 400F oven until a knife inserted in the center comes out clean. I often double or triple this recipe, it's about 25 minutes for the recipe above.

I like to also add black pepper to the recipe to round out the flavors. For a twist try adding corn kernels, jalapenos, or shredded cheese to the mixture. 

12.27.2011

Handmade Wheat Bread


Homemade Wheat Bread Update:


I've been using bread machine yeast added directly to the dry ingredients instead of proofing the yeast. To free up my mommy hands the mixer has taken the role of dough kneader. Still using the same recipe found below I've found Lazy Wheat Bread. I wrote the article on HubPages so follow the link for step by step instructions with photos.


I've always been picky when it comes to grocery shopping. In the five years I worked as an analytical chemist I encountered my fair share of chemicals and their safety sheets. So, I always read ingredient labels with a high level of scrutiny. Loren Cordain, the author of the Paleo Diet also made a very good point in his book. "If you have to add vitamins and minerals to make something nutritious, why are you eating it?" It's amazing to me how many ingredients are listed on a loaf of bread, even the bread in the bakery section of the supermarket has a similar list.

I've made bread in the past, but I've always used the bread machine to make the dough. When the machine beeped I would shape it and bake it myself because I don't like the texture of the crust when baked in the machine. Pizza dough has always been one of the top reasons to pull out the bread machine. I'd add the ingredients before going to work and set it to finish right before I came home. Voila, homemade pizza!

I've never been a fan of the wheat bread purchased in the store but wanted to make some of my own. In the past I tried making wheat bread but always made bread bricks instead. I love food and cooking, so when I haven't mastered something I MUST try again. So, the other day I pulled out the wheat flour and followed the directions on the bag. In my previous attempts, it turns out that I didn't let it rise 3 times. All of the white breads I've ever made only required 2 risings.

My next hurdle was proofing the yeast. I have never activated yeast separately in a bowl of warm water. I had no idea what it should look like. The recipe said to dissolve the yeast in water and let it sit for 5 minutes until it starts to foam. On the first attempt, I stirred the water and yeast together. It wasn't sure if I had foam or not so I Googled some images. The pictures I saw reminded me of scum growing on top of a pond. Since I stirred mine together it looked more like watered down baby food. I dumped it out and tried again. This time I sprinkled the yeast on the surface of the water. It looked better, but after 10 minutes I still had dry yeast on the surface. I felt the water temperature and it already felt cold. I was afraid I'd make more bricks if the majority of  the yeast wasn't activated.

On my third attempt I used a thermometer to measure the temperature of the water. I remembered seeing something online about 110 degrees. Then, I very carefully sprinkled the yeast over the surface as evenly as I could. This time it looked more like the images I saw online. So I added it to my dry ingredients and began to knead. The recipe said 8 to 10 minutes, but I went for 10. I covered it in a bowl I oiled with olive oil. After letting it rise for 1 hour I kneaded it again for 5 minutes or so. The dough went back into the same bowl, covered with plastic wrap, and I let it rise another 45 minutes.

When the dough doubled in size for the second time I became hopeful that I was on the right track. After kneading the dough for the 3rd time I was happy to put it into my parchment lined bread pans. (If you've never used parchment paper before, I HIGHLY recommend trying a roll. When you see how easily things can be removed from a pan you'll be hooked too.) For the next 45 minutes I let the dough rise for the last time. I popped it into the oven until it was golden brown on top.

The bread was supposed to sound hollow when tapped on the bottom. It made a noise, but I wasn't sure if it was because I had made another brick or if I finally got it right. When I cut into the loaf it was perfect! I slathered a piece with butter and it was delicious. To me, store-bought wheat bread has a flavor that I'm not crazy about. This bread had the homemade texture, the nutritional benefits of wheat, and it didn't have that store-bought flavor.

Besides having delicious bread I found a great sense of pride and satisfaction that I made bread, from scratch, with my bare hands. Sure the overall time span was close to 4 hours, but I'd say it was well worth it. This weekend I plan on doubling the recipe and freezing a few loaves. Here is the recipe I used on the back of a bag of Stone-Buhr whole wheat flour:

1 pkg (2 1/4 tsp) of active dry yeast
1 1/8 cup of warm water
1 Tbsp of brown sugar
1 Tbsp of olive oil
1 1/2 cup of whole wheat flour
1 1/2 cup of unbleached white bread flour*
1 tsp of salt

This is how I put it together: Sprinkle the yeast on top of the warm water. In a separate bowl combine the dry ingredients and add the olive oil. When the yeast mixture is ready add it to the dry ingredients and mix together. On a floured surface knead the bread, adding more flour as needed, for 10 minutes. Oil the bowl where the dough will rise to prevent it from sticking and cover with plastic wrap. After an hour, knead the dough for 5 minutes and let it rise for 45 minutes in the same bowl. When the dough has doubled in size, about 45 minutes, knead it again and put it into the bread pan(s). Cover the dough with the plastic wrap and let it rise for another 30-45 minutes. In a 400 F oven bake for 30 to 40 minutes.

*Since I was essentially out of white bread flour I made up the difference with all-purpose flour.

12.26.2011

Chicken Florentine


After the chicken I pulled from the freezer had thawed I discovered it was one large split chicken breast and not the two I thought it was. Since I knew there wasn't enough chicken to serve it as the main dish I knew I had to incorporate it into something. Initially I thought of stir-fry's and pasta dishes, but decided to look for a casserole recipe instead. There's something warm and comforting about a casserole in the winter. I typed the word casserole into the search box on Allrecipes.com and Chicken Florentine was at the top of the list. I've never eaten this dish but it sounded interesting. Below, you will find the original recipe I found on the site:

Chicken Florentine by BRYAN0320 

Ingredients

  • 4 skinless, boneless chicken breast halves
  • 1/4 cup butter
  • 3 teaspoons minced garlic
  • 1 tablespoon lemon juice
  • 1 (10.75 ounce) can condensed cream of mushroom soup
  • 1 tablespoon Italian seasoning
  • 1/2 cup half-and-half
  • 1/2 cup grated Parmesan cheese
  • 2 (13.5 ounce) cans spinach, drained
  • 4 ounces fresh mushrooms, sliced
  • 2/3 cup bacon bits
  • 2 cups shredded mozzarella cheese

Looking over the ingredient list I had most of the ingredients but decided to create my own version instead. I didn't have mushrooms, mozzarella, or the canned soup. Since sauces are very easy to make I rarely buy condensed soups or sauce mixes. Although I had lemon it didn't sound good to me so I omitted it.

I began by browning 4 strips of bacon in a pan over medium heat. When they were crisp I put them on a paper towel to drain. The bite size pieces of raw chicken I had cut were added to the bacon drippings to cook. When they were cooked completely I removed them from the pan onto a paper towel to drain. In the very same pan I added a bag of frozen spinach. Typically I'm not a fan of cooked spinach, especially when it reminds me of the green goo with a metallic taste that was served with school lunches. GAG! If spinach is cooked correctly it is delicious. Spinach and Artichoke Dip, Spinach Quiche, and Spinach Dip are a few of my favorites. 

While the spinach was thawing/cooking in the pan I began to create my sauce. In a medium sauce pan over medium heat, I added 3 tablespoons of butter. When the butter melted I added 2 tablespoons of all-purpose flour and whisked the two together to create a roux. After cooking about 5 minutes, to remove the flour taste, the mixture turned yellow. Ideally it is best to add hot liquid so that the butter in the roux doesn't clump. I added approximately 3 cups of cold milk to the roux to make a bechamel, or white sauce. Continually whisking until the milk warms allows the clumps will break apart. Just be sure to use 100% butter otherwise the sauce may separate. 

When the spinach had thawed I added salt, pepper, and 4 minced cloves of garlic while continuing to cook over medium heat. Stirring occasionally, my goal was to evaporate excess moisture from the pan. The spinach wasn't 100% dry, but the water created by the melting process was no longer in the bottom of the pan. When it was completed I covered the bottom of a 13"x9" pan with the spinach and topped it with the chicken. 

The white sauce began to steam and I added 1 tablespoon of Italian seasoning and 3/4 of a cup of freshly grated parmesan. Since the original recipe called for Italian seasoning I thought I'd take it a step further and create a semi-alfredo sauce as well. I say "semi" because typically alfredo sauce consists of butter, cream, parmesan, and parsley. When the cheese melts and the sauce nears it's boiling point the true thickness of the sauce will be created. Sauces and gravies created with four will thicken when the boiling point is reached. I recommend adding milk if the sauce is somewhat thick. It will go into the oven and condense some more. The sauce will go over pasta so create the thickness you desire.

Pour the sauce over the chicken and spinach. Sprinkle the top with a light layer of grated parmesan and finally crumbled pieces of bacon. Put the casserole into a 350 F oven for 20-30 minutes to give the flavors a chance to marry. While in the oven, cook your favorite pasta to accompany the dish.

Top the pasta with the Chicken Florentine and enjoy. My husband, who usually turns his nose up at green vegetables, couldn't eat it fast enough. AND he finished the rest the following day.

Jennifer's Recipe
  • 1 large butterflied chicken breast
  • 1 bag of frozen spinach
  • 4 cloves of garlic
  • 3 tablespoons of butter
  • 2 tablespoons of all-purpose flour
  • 3 cups of milk
  • 1 cup of parmesan
  • 1 tablespoon of Italian seasoning
  • 4 strips of bacon 
Additional Recipes by Jennifer

5 Hour braise with only 3 ingredients.

Brining a turkey and rubbing it with a compound butter.
Winner of a HubNugget Award

Recipes for hummus, rye bread stuffing, and mom's cranberry sauce.